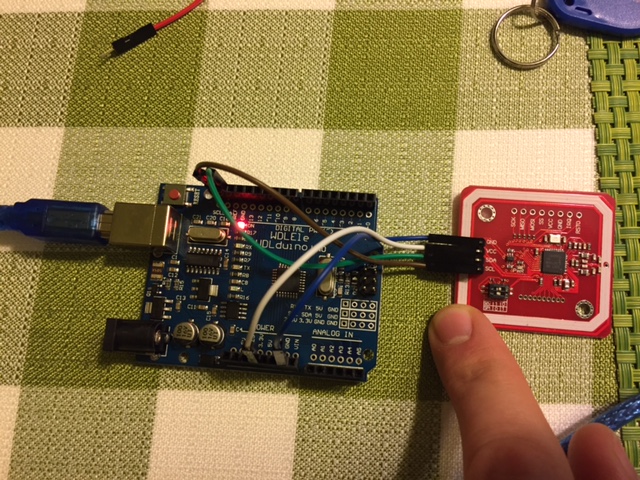
Elechouse PN532 NFC Module V3 for Arduino etc.
-
Not bad, it should do the trick. I actually just removed the steering lock in the skyline to do this, I was looking for an electrically actuated steering lock off a late model car to replace it but never quite got there.
-
from my copious googleing it looks like its just a spring i need to remove...which shouldnt be hard....
want to leave the key in the car for a month or so.......JUSTIN CASE
-
Haha, yeah. I compensated for the removal by installing a combination gps tracker and killswitch.
-
so both good news and bad....got the device in and mounted....
but burnt out my imoboliser....didnt even know i had one.....so trip to the auto elec's tomorrow -
@MarkGabb urk. How'd you manage that?
-
well im not sure.......but i have a theory.... there is an Nti jumpstart plug on my cylinder, cant start car unless keys are in ignition.... so i bridged the wires.....
have a feeling it may have a resistive circuit instead of a strait switch...
-
basicly the most icdo know is that it did work, then suddenly which trying to start it now cranks over but wont latch on....
-
@Lokki I bought one of these for mi Raspberry pi 2. I would like to know how to conect to it.
What would be an easy way? Perhaps with a TTL to USB cable directly to a usb raspberry port?
I am newbie :D -
@Javier, sorry connect which to the Raspberry Pi? They have a pin header which provides GPIO access for things like I2C interface (for a PN532 reader module) and programmable pins that will allow you to control relays to affect real-world parts of your vehicle.
I don't particular like Raspberry Pi and so I don't have a huge amount of experience using them, but that's the basics right there.
But no. Probably not TTL converters, and probably not via a USB port. -
Hi all,
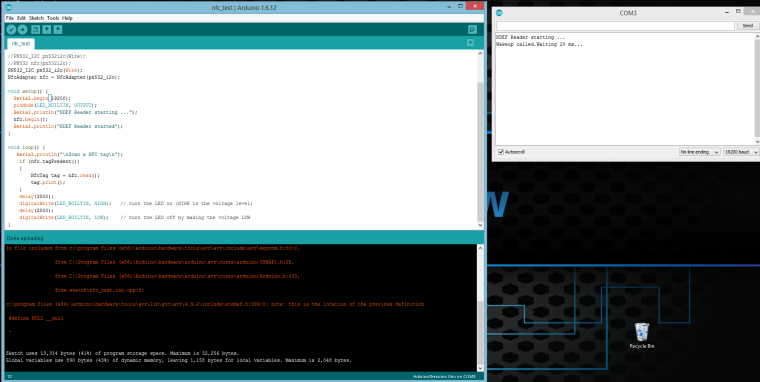
I've ordered the same module and fighting with that for more that a week, but without any success. I've the version 3 of the NFC module and WDLduino UNO. I've switched the NFC module to use I2C (switch 1 on, switch 2 off). The problem is, that the sample code does not go through the initialization state, so the loop never starts. Also the initialization does not write that the board is not found, it only hangs. What is also interesting, that the power light on the NFC module is also off.
I've 2 ARDUINOs (the same type) and also two NFC modules (ordered from different stores), but both have the same issue. Do you have any idea, what could be the problem or what else can I check?Some additional notes: I've turned on the debugging on the NFC library, so I know, that the code is hanging on PN532_I2C::wakeup, the _wire->endTransmission(); never comes back (PN532_I2C.cpp).


Any idea or help would be appreciated.
-
Hi @Pingi , what you've got there so far all looks correct physically, but the fact that the power light isn't coming on is interesting - it definitely should when power is connected, regardless of what is running on the code side of things.
You might need to double check all that, possibly use a multimeter to make sure that you're actually getting power at the reader unit. -
Hey guys, need your help with similar problem as discussed earlier. My PN532 NFC module V3 won't work in I2C mode. I've switched the switch to correct possition, I've tried with both 3.3V and 5V. The module is powered (LED is on). When everything is connected, the COMM manager only says "Hello" and nothing else. If I disconnect one of the cables, it will say "Didn't find PN53x board". I have changed the initial "elif" statement, as written in the handbook, so it will work in I2C mode. However, I still can't get past the "Hello".
Any suggestions?
Many thanks ;) -
I have the same issue. I am trying to conect a elechouse PN532 NFC module V3 to arduino nano and nothing. Same problem. Only says "hello".
-
What code and libraries are you guys using to try to make it happen?
-
Hi @Lokki, thanks for you answer, I've tried a lot of different ways, how to power the NFC board, but the power led is still off. So, I've decided to open a complain at the store where I've bought the NFC shield, as in my opinion, the power led should at least work, otherwise the shield is non-functional.
-
@Pingi No worries. With mine, the power led is on when power is applied, no matter whether data is hooked up or not.
-
@Lokki Hey, thanks for getting back to me. I'm using the recomended library by Elechouse (on github under elechouse/PN532) together with included NDEF library. I also tried Don's NDEF library, but I think they're the same.
-
@zafod no worries. Just make sure that you've extracted the libraries correctly (it was a couple of windows installs ago for me now, but there was difficulty in placing/extracting directories with one of the library sets).
Then maybe try it with my dodgy bit of code, just to see what happens - that will still let you view output from the reader the same way. -
I could make it work.(sorry from my english..I am an uruguayan native :) )
I took my libraries from this tutorial:
http://www.instructables.com/id/NFC-Ring-Lock-Box/
Also , this are some steps that i did:- I asigned read/write permissions to arduino libraries folder.
- Just put on libraries the same from tutorial
- I changed the conexion pin to 3.3V , not 5V from arduino to nfc reader.
- Before upload the code, y pressed arduino nano reset button some seconds!, after that y upload the code.
- I modified the code removing that was not required.
Its seems that the lines thats gets the firmware doesn´t work.
This is the code( i don´t wnow hoy to formatead it)
#include <Wire.h>
#include <PN532_I2C.h>
#include <PN532.h>

PN532_I2C pn532i2c(Wire);
PN532 nfc(pn532i2c);

void setup() {
  Serial.begin(115200);
  Serial.println("Hello!");
  nfc.begin();
  nfc.SAMConfig(); // configure board to read RFID tags
  Serial.println("Waiting for an ISO14443A card");
}

void loop() {
  String ringUid;
  boolean success;
  uint8_t uid[] = {0, 0, 0, 0, 0, 0, 0}; // Buffer to store the returned UID
  uint8_t uidLength; // Length of the UID (4 or 7 bytes depending on ISO14443A card type

  success = nfc.readPassiveTargetID(PN532_MIFARE_ISO14443A, &uid[0], &uidLength);

  if (success) {
    Serial.println("Found a card!");
    Serial.print("UID Length: ");
    Serial.print(uidLength, DEC);
    Serial.println(" bytes");
    Serial.print("UID Value: ");

    for (uint8_t i=0; i < uidLength; i++) {
      Serial.print(" 0x");
      Serial.print(uid[i], HEX);
      ringUid += String(uid[i], HEX);
    }

    Serial.println("");
    // Wait 1 second before continuing
    delay(1000);
  }
}
(edit) indent express train ran by @andreas
-
@Javier, glad you're back.
I've fixed the code insertion, if you "edit" your post you'll see what I've done with the three backticks at the start and end of the code there.Have you got the libraries installed on your computer properly? These are the ones I use, they're for the module.
https://github.com/elechouse/PN532
Make sure that you follow these instructions, they're on the front page of the github:
Getting Started
Download zip file and extract the three folders(PN532, PN532_SPI, PN532_HSU and PN532_I2C) into libraries of Arduino.
Downlaod Don's NDEF library and extract it into libraries of Arduino's into a new folder called "NDEF" (Note if you leave this folder as NDEF-Master Arduino will not be able to use it as a library)
Follow the examples of the PN532 library